
Reverse Parallel Park Like a Pro
By Rocco Amuso · Last updated 24 Oct 2025
Key Takeaways
- Reverse parallel parking is a manoeuvre that involves parking your car lengthwise to the curb between two cars and requires a parking space at least one and a half times the length of your car. The process can be broken down into seven detailed steps, from identifying the parking area and approaching the car you’ll park behind, to executing the reverse and aligning your car parallel to the curb. Key tips include checking mirrors regularly, avoiding the accelerator, and practicing in small steps for better confidence and accuracy.
- Bullet Points on How to Reverse Parallel Park:
- Identify the Area: Check central and side mirrors, signal left, and slow down as you approach the parking area.
- Approach the Car: Pull up beside the car you’ll park behind, maintaining a gap of 0.5 to 1 meter.
- Prepare to Reverse: Line up your back side window with the front car’s tail light, put the car in reverse, and check mirrors.
- Begin Reversing: Turn the steering wheel fully to the left, let the car move at a slow pace until 45 degrees to the curb, then straighten wheels.
- Reverse Straight Back: Lower the left mirror to see your left tire and reverse until about 0.5 meters from the curb.
- Align Parallel to the Curb: Turn the wheel fully right, move back until parallel, then adjust the wheel to the left to straighten.
- Finalize Position: Move the car forward slightly to ensure it’s about 1 meter from the car in front.
- Tips for Success:
- Always check mirrors, indicate, and perform head checks.
- Practice the manoeuvre in parts before attempting the full sequence.
- Use reversing cameras or mirrors to aid precision.
Reverse parallel parking is one of the top manoeuvres that causes anxiety for learner drivers. It is often one of the first things parents ask me about, and many are hesitant to teach this manoeuvre to their young driver themselves.
To learn this manoeuvre, students will often research videos on YouTube - but these can be hit and miss in terms of teaching the correct method. While it takes some practice to master, when it is broken down into small steps, nothing can be simpler!
This article will explain in detail how to correctly execute a reverse parallel park, so you can get into those in-demand spots safely and quickly with a minimum disruption to the traffic flow around you.
What is Reverse Parallel Parking?
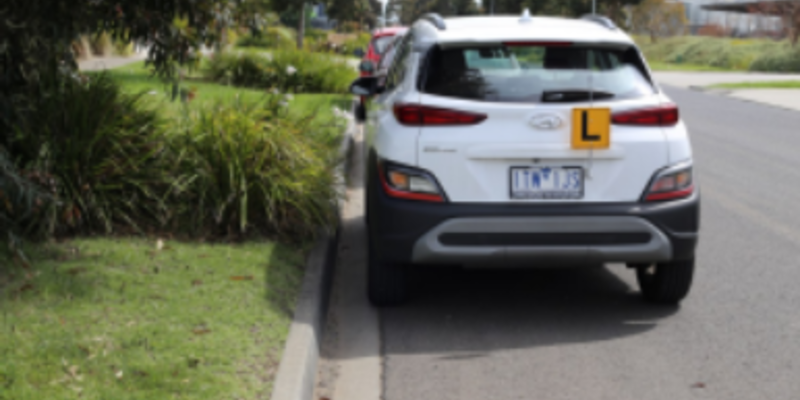
A reverse parallel park is required, and is often the safest option, when you are parking your car lengthwise to a curb and between two cars.
To execute this manoeuvre properly, the space you are parking in must be at least one and a half times the length of your car. This is important for the parking manoeuvre to be successful and safe. Luckily, most designated car spots with line markings are at least one and a half times the length of an average car. If your chosen car park does not have line markings (or drawn boxes), then you can estimate the length of the parking space by pulling up alongside the space and looking to see if you have about 1 metre in front of your car as well as 1 metre behind the car. If you do not have the required clearance, don’t risk it and move on to find a different, more suitable parking spot.
How to Reverse Parallel Park
Below, I have summarised the steps required to successfully execute a reverse parallel park, and then gone into each step in more detail so that you can understand why each step is important and when to execute it.
There are 7 steps involved in properly executing a reverse parallel park.
- Identify the area where you are going to do the manoeuvre. Check central and side mirrors, and indicate to the left.
- As soon as you indicate, start to slow down and pull your car up about half a metre away and alongside the car you will be parking behind. This is the front car if you are parking between two cars. By the time you get alongside the front car, you need to be travelling at a walking pace.
- Line up the middle of the back passenger window with the rear tail light of the front car, and put the car in reverse. Check mirrors and look behind you.
- Turn the steering wheel full lock to the left and let the car move until it is 45 degrees to the curb. Then turn the wheel one and a half turns to the right so the wheels are straight. Check mirrors and look behind you.
- Move straight back until the back wheel of your car is about half a metre from the curb. Check mirrors and look behind you.
- Turn the steering wheel full lock to the right then move back until the car is straight with the curb.
- When the car is straight, turn the steering wheel one and a half turns to the left and take the car forward until it is about 1 metre from the back of the front car. Check mirrors and look behind you.
Let’s take a look at each step in detail.
Step 1: Identify where you will park
As you approach the car that you will be parking behind, check your central mirror and your side mirrors. Signal left to indicate that you are planning to reverse parallel park into the vacant spot.
Step 2: Approach the car you will be parking behind
- Approach the car that you will be parking behind at walking pace and pull up beside the car.
- Leave a gap of not less than half a metre but not more than a metre between you and the parked car. To help you gauge the right distance, imagine that there is a person standing next to the car.

- Check your mirrors and look behind you (important!).
Step 3: Prepare to begin the reverse parallel parking manoeuvre
- As you pull up beside the parked car, line up the middle of your back side window with the red tail light of the parked car (green dot).
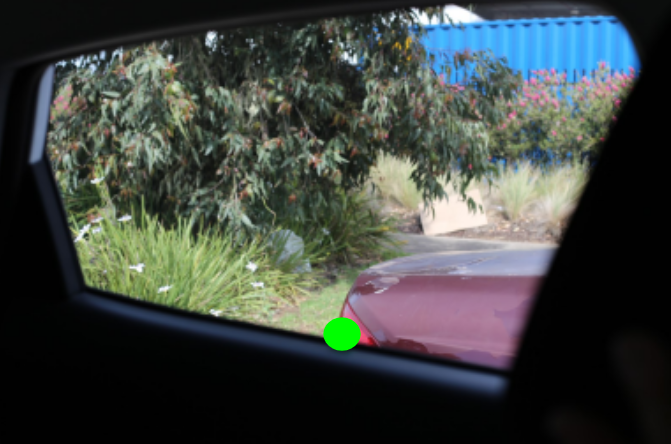
- Place the car in reverse.
- Check mirrors and look behind you to ensure the way is clear.
Step 4: Begin to reverse into a 45 degree angle
- Turn the steering wheel fully to the left and let the car begin to move by taking your foot off of the brake. This is a slow speed manoeuvre so you must never put your foot on the accelerator. Control the speed with your brake and let the car travel under its own power.

- Move back until the car is at 45 degrees to the curb.

- Turn the steering wheel one and a half turns to the right. This will change the angle of the tires so that the car can move straight back.

- Check mirrors and look behind you.
Step 5: Reverse straight back
- Lower the left side mirror until you see the bottom of your left tyre.
- Allow the car to move straight back (again, don’t use the accelerator, just release the brake) until the bottom of your left tyre is approximately half a metre from the curb.
If you have a reversing camera, this step is even easier! Allow the car to move straight back until the first line on your reversing camera is in the middle of the curb. In some cars, this line will be yellow, in others it may be blue. Essentially, you want to use the line on your camera that puts your back passenger wheel about half a metre away from the curb.

- With the wheels in the straight position and while moving back slowly, stop reversing when you reach either of those markers (either the reverse camera or the back tyre).
Step 6: Swing the car until it is parallel to the curb
- Turn the wheel fully to the right.

- Gradually move back until your car is straight and parallel to the curb. Keep a close eye on the car in front so you don’t get too close while you are reversing.
Step 7: Move the car into the final position
- Once your car is straight, turn the wheel one and a half turns to the left. The wheel should now be in the straight position.

- Put the car in drive and move the car forward slightly. Stop about 1 metre from the car in front.

Congratulations, you have just completed a successful reverse parallel park!
When leaving the car park
We have successfully learned how to reverse parallel park into a parking space. Now we’ll review how to get out!
- If you have used the mirror down position as part of your reverse parallel park manoeuvre, take the mirror back to the normal viewing position before moving off.
- Place the car in reverse and move back far enough so you can just see the bottom of the tyres of the car in front, right where they touch the road. Moving back this distance will allow you to move around the car safely.
- Check mirrors.
- Indicate that you intend to leave the parking spot and enter the flow of traffic.
- Head check right and, when safe, move off slowly and then quickly up to speed, being careful not to go over the speed limit.
Tips & Tricks for Reverse Parallel Parking
Tip 1: Don't forget to check your mirrors
While the aim is to park the car safely between two cars at about 25 to 30 cms from the curb, the method for how you execute the reverse parallel park is just as important!
If you do not do your head checks, indicate, look behind you, or if you cause other road users to change their direction of travel, this could be an immediate fail in your driving test.
So remember, every time you stop the car and then move, you must check mirrors, indicate and head check (i.e. check your blind spot).
Tip 2: Practice the reverse parallel park manoeuvre in small steps
After a bit of practice, you will be able to reverse parallel park easily.
But if you’re finding it a little overwhelming at first, you can also break this manoeuvre up into small sections. First, practice the approach to the parked car. When you’re happy with this, move to the next step and practise the approach and the 45 degree turn, then practise moving back, and so on. Finally, put it all together for the complete park.

About the author